


The Anglo-Zulu War, also known as the Zulu War, was fought between Britain and the Zulus in 1879. It is notable for several bloody battles and as a landmark in the timeline of colonialism in the region.
In 1874, Lord Carnarvon, Secretary of State for the Colonies, who had effectively brought about federation in Canada in 1867, thought that similar political effort, coupled with military campaigns, might succeed with the African kingdoms, tribal areas, and Boer republics in South Africa. In an attempt to extend British influence in 1875, Carnarvon approached the Boer states and tried to organise a federation of the British and Boer territories, but the Boer leaders turned him down.
The Path to Conflict
In 1877, Lord Carnarvon made Sir Bartle Frere the High Commissioner for Southern Africa. Carnarvon appointed Frere with the understanding that he would work to enforce his confederation plan. In return, Frere could become the first British governor of a federated southern African dominion. Frere was sent to South Africa as High Commissioner to bring this plan to fruition. Still, he faced obstacles such as the presence of the independent states of the South African Republic, the Kingdom of Zululand, and its army.
Without the approval of the British government and with a probable intent of instigating a war with the Zulus, Frere presented a request on 11 December 1878 to the then Zulu king, Cetshwayo, asking to disband his army and abandon critical cultural traditions. Cetshwayo rejected the demands by not responding, and a concession was granted by the British until 11 January 1879, after which a state of war was deemed to occur.
The Invasion
A British force led by Lieutenant General Frederick Augustus Thesiger, the second Baron Chelmsford, invaded Zululand without authorisation from the British Government. Chelmsford commanded a force of 5,000 Europeans and 8,200 Africans, while Cetshwayo’s army numbered about 40,000 men. Three columns were to invade Zululand from the Lower Tugela, Rorke’s Drift, and Utrecht, respectively, with their objective being Ulundi, the royal kraal.
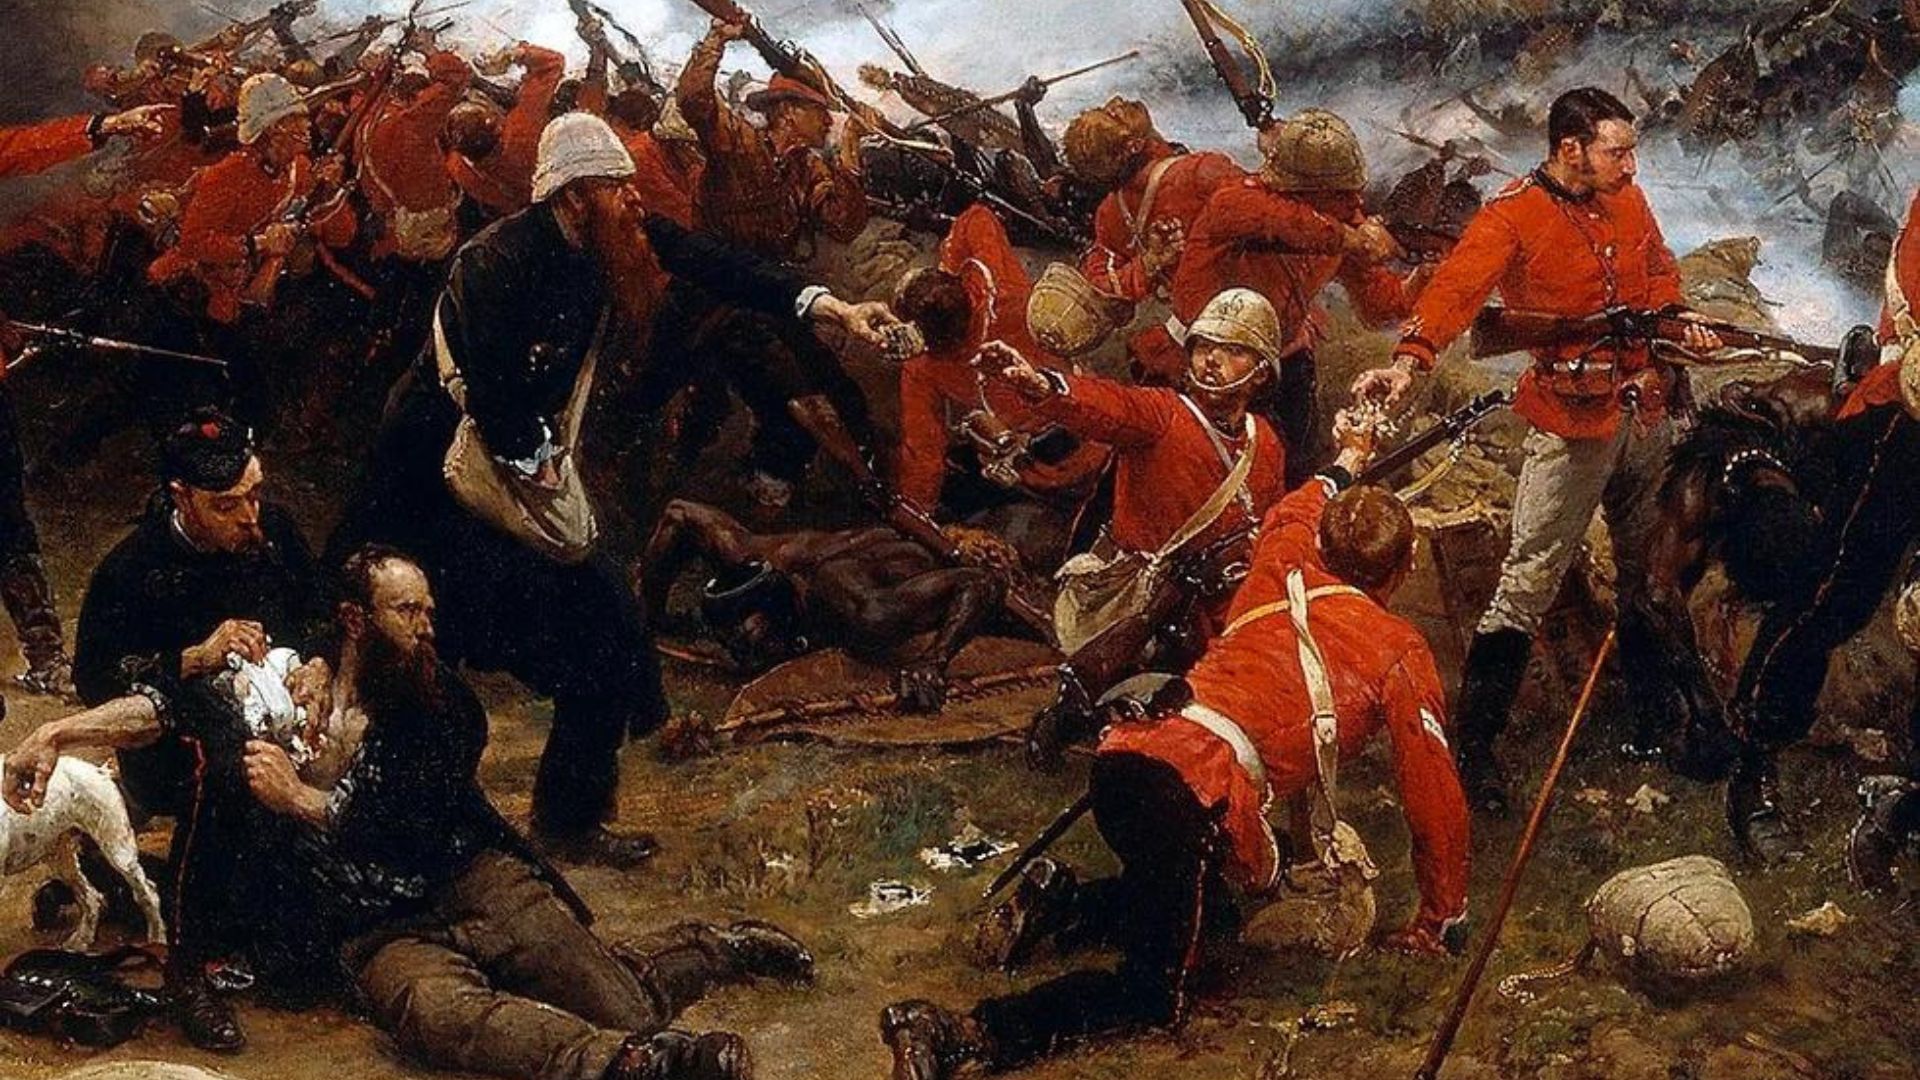
On 22 January, the centre column, which had advanced from Rorke’s Drift, was encamped near Isandlwana. Chelmsford split his forces and moved out, leaving the camp in charge of Colonel Pulleine. The British were outmanoeuvred by the Zulu army, which was nearly 20,000 strong and led by Ntshingwayo kaMahole Khoza. Chelmsford’s refusal to set up the British camp defensively and ignoring information that the Zulus were close at hand were decisions that all later regretted. The Battle of Isandlwana was the first significant encounter in the Anglo-Zulu War and the greatest victory the Zulu kingdom would enjoy. The British centre column was wrecked, and its camp was annihilated with heavy casualties of 806 Europeans and 471 Africans, as well as the loss of all its supplies, ammunition, and transport. The defeat left Chelmsford no choice but to retreat out of Zululand quickly.
In the battle’s aftermath, some 4,000 Zulus mounted an unauthorised raid on the nearby British army border post of Rorke’s Drift and were driven off after 10 hours of ferocious fighting.
Siege of Eshowe and Other Battles
While the British central column under Chelmsford’s command was engaged, the right flank column on the coast, under Colonel Charles Pearson, crossed the Tugela River, fought with a Zulu impi at the Inyezane River, and advanced as far as the deserted missionary station of Eshowe. Pearson made plans to withdraw beyond the Tugela River after learning of the disaster at Isandlwana. However, before he decided whether to put these plans into effect, the Zulu army managed to cut off his supply lines, and the siege of Eshowe began.
Meanwhile, under Colonel Evelyn Wood, the left flank column at Utrecht had initially been charged with occupying the Zulu tribes of northwest Zululand and preventing them from interfering with the British central column’s advance on Ulundi. Wood set up camp at Tinta’s Kraal, just 10 miles south of Hlobane Mountain, where a force of 4,000 Zulus had been spotted. He planned to attack them on 24 January but decided to withdraw back to the Kraal after learning of the disaster at Isandlwana. Thus, one month after the British invasion, only their left flank column remained militarily effective, and it was too weak to go to battle alone.
British Reinforcements and Subsequent Battles
The British government rushed seven regiments of reinforcements to Natal, along with two artillery batteries. On 12 March, an armed escort marching to Luneburg was defeated by about 500 Zulus at the Battle of Intombe, with the British force suffering 80 killed and the loss of all their supplies. On 29 March, a column under Lord Chelmsford, consisting of 3,400 British and 2,300 African soldiers, marched to the relief of Eshowe.
Additionally, Chelmsford ordered Sir Evelyn Wood’s troops to attack the abaQulusi Zulu stronghold in Hlobane. Lieutenant Colonel Redvers Buller led the attack on Hlobane on 28 March. However, as the Zulu main army of about 20,000 men approached to help their besieged tribe members, the British force began a retreat, which turned into a rout, resulting in about 225 casualties in the British force.
The next day, Zulu warriors attacked Wood’s 2,068 men in a well-fortified camp at Kambula. The British held them off in the Battle of Kambula, and after five hours of heavy attacks, the Zulus withdrew with heavy losses. British losses amounted to 83 (28 killed and 55 wounded), while the Zulus lost about 2,000 men. The effect of the Battle of Kambula on the Zulu army was severe, and many downhearted warriors went home.
Chelmsford’s column marched on Eshowe, and on 2 April, the main camp was attacked at Gingindlovu. The British suffered only two dead and 52 wounded, while the Zulu losses were heavy, estimated at 1,200. The British evacuated Eshowe on 5 April, after which the Zulu forces burned it down.
By mid-April, almost all the reinforcements had arrived, totalling about 16,000 British and 7,000 native troops. Chelmsford reorganised his forces and marched to the royal kraal of Ulundi, intending to defeat the main Zulu army. On 4 July, the armies clashed at the Battle of Ulundi, the last major battle of the Anglo-Zulu War. The British force, formed in a hollow square, was attacked by a Zulu army, and Cetshwayo’s forces were decisively defeated. The battle ended in a decisive victory for the British, whose losses were about 100, while the Zulus lost about 1,500 men.
Aftermath
After the Battle of Ulundi, most leading chiefs tendered their submission, the Zulu army dispersed, and Cetshwayo became a fugitive. Wolseley, having relieved Chelmsford after Ulundi, took over operations. On 28 August, Cetshwayo was captured and sent to Cape Town. His removal was formally announced to the Zulus.
Wolseley wasted no time discarding Bartle Frere’s confederation scheme and drew up a new scheme that divided Zululand into thirteen chiefdoms headed by compliant chiefs. This ensured the Zulus would no longer unite under a single king, making internal divisions and civil wars inevitable.
In 1883, Cetshwayo was brought back from exile due to public sympathy for his plight, fueled in part by the writings of Lady Florence Dixie, a correspondent of the London Morning Post. That same year, the British tried to restore Cetshwayo to rule at least part of his previous territory, but Chief UZibhebhu started a war contesting the succession. On 22 July 1883, led by a troop of mounted Boer mercenaries, he suddenly descended upon Cetshwayo’s kraal at Ulundi, which he destroyed. Cetshwayo, wounded, escaped into Nkandla forest, and after appeals from the Resident Commissioner, Sir Melmoth Osborne, he moved to Eshowe, where he died soon after.
Long-term Effects
The Anglo-Zulu War marked the end of the independent Zulu Kingdom, and Zululand was eventually annexed by the British Empire in 1887. The war had a profound impact on the region’s history, contributing to the tensions that would ultimately lead to the Anglo-Boer Wars and the establishment of apartheid in South Africa. The conflict also exposed the British military’s tactics, organisation, and equipment weaknesses, which would be addressed and improved upon during the subsequent imperial conflicts. Finally, the war marked the end of the era of European explorers and adventurers in southern Africa and the beginning of more structured colonial rule.